
Night Sky Photography Tutorial
I have always been interested in photographing the night skies so I decided to write this night sky photography tutorial. There is something about standing below the stars, feeling that wonder at the world. It is a similar feeling of awe and uplift I get when I watch big waves. Peacefulness and quiet in the world at night.
On any of my landscape photography workshops in Scotland, there is always the possibility of photographing the night skies. It is often a slim possibility in the winter in Scotland! But when Scotland does get clear skies, it can be incredible. So, if I see a good forecast, I always arrange the day so there is an option to try night sky photography.
Camera equipment
Camera gear is important when it comes to photographing the night sky. A full-frame camera is the best way to photograph the night sky. Medium format is also good! I used the Nikon D800 for many years to photograph night skies. Coupled with an incredible Nikon Lens, the 14-24 mm F/2.8. I now use the Fujifilm GFX 50s with the 23mm Lens.
Here is some equipment you may need:
A fast wide-angle lens. Having a lens with an aperture of f/3.5 or faster is needed for photographing the night sky. A wider angle comes into its own for two reasons. Firstly, you can capture more of the sky with a wide-angle. And the other reason is when we come to the rule of 500. A wider angle means you can achieve a longer shutter speed without the stars beginning to trail.
A good tripod is essential for the long exposures needed to photography the night skies.
It’s important not to touch the camera at all, so use a remote cable to get the sharpest image possible.
Focusing at Night
One of the most important and also difficult skills in night photography is focusing. Once you have your focus, the rest is relatively simple. The stars are very far away so we can simply focus on infinity. Most lenses have an infinity symbol to mark approx infinity focal points. However, bear in mind this does not guarantee sharpness. Most lenses need slight adjustments from infinity.
Here are some common focusing techniques.
Preset your camera during the day when it is light. Adjust the lens to focus on infinity or a faraway horizon. This doesn’t have to be on location. But if you can focus on the actual scene and then wait till dark, all the better.
Take practice shots at f/8 -f/11 and check if everything is in focus. If it isn’t, adjust the focus till perfect. Your lens is now focused on infinity. So mark your lens or tape the exact point of infinity for that lens so you can refer to it later.
Set camera to manual and use live view. For use on cameras with live view only. Switch on live view, adjust the lens to infinity and use the zoom button to zoom into the brightest star. Turn your focus ring until the star is in focus. Turn off live view and take a practice shot.
Trial and error is also another technique! Focus on infinity and see if the shot is in focus. Turn the ring slightly and take another shot. Be aware though it is very hard to see on the back of the screen at night if the focus is actually achieved.
Fujifilm users will find that there is an internal distance scale as opposed to an infinity mark on the lenses. To show this choose shooting menu item 3 > Disp. Custom settings. Here you will find all the display options that show up including the AF distance indicator.
A Quick Guide to settings
- Fully manual
- ISO 1600-3200
- 20-30 sec Shutter Speed
- Manual focus
- Long exposure noise reduction Off
- RAW. Shooting in raw gives you so much more control over processing your final file
Shutter Speed
When shooting the night skies, it is important to keep the shutter speed as low as possible to avoid the stars blurring into trails. Balance this with a longer exposure picking up more light. Which means you see more stars. As a guide around 25 seconds is a good Shutter speed.
Use the 500 rule to avoid trailing stars. This is 500 divided by the 35mm equivalent focal length. For example, if you are using a 20mm lens on a full-frame camera, 500 divided by 200 would give you a shutter speed of 25 seconds. If using a cropped sensor, add your crop factor in.
ISO
ISO is the final setting in the equation. Start around 1600 and simply go and up and down from there to achieve a good exposure.
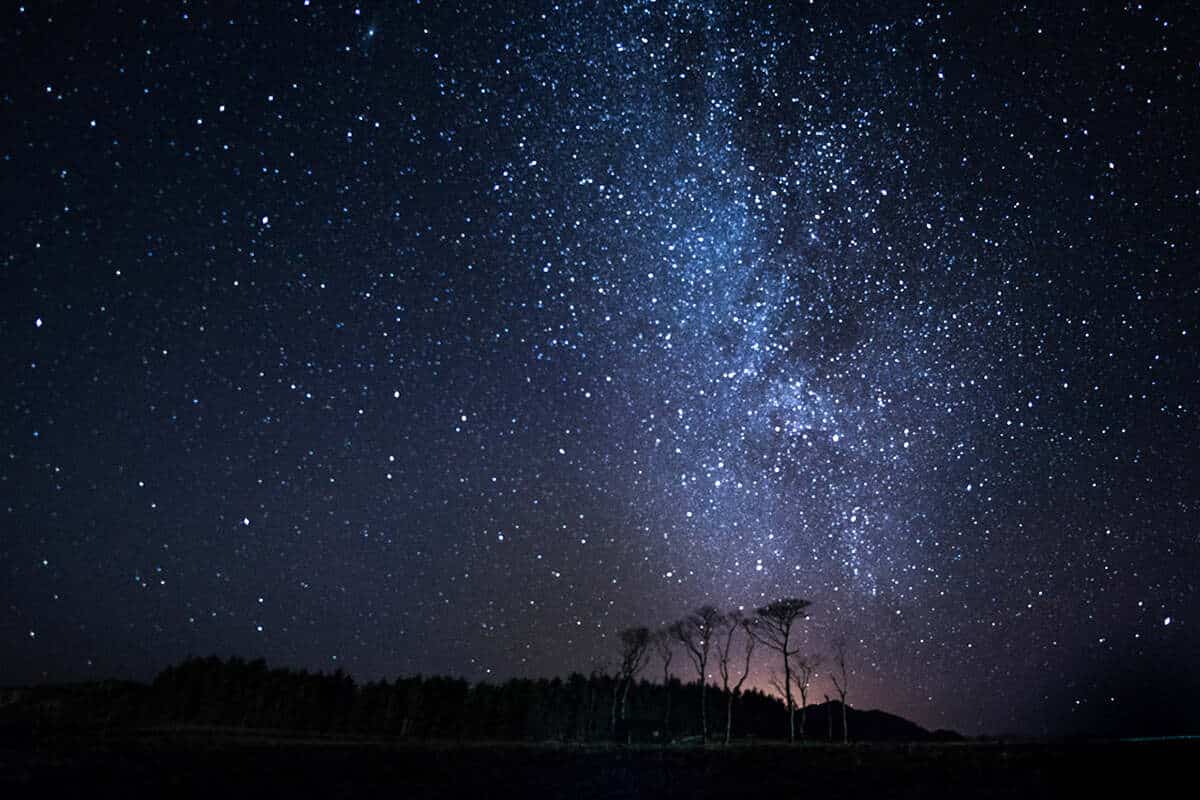
Examples
Here are some images from Scotland I photographed with my D800 plus 14-24mm lens. I got so familiar using this combination that I knew instinctively exactly where the focus needed to be set to.s
When I switched over to Fuji and bought the GFX 50s. I also purchased the 23mm Fujinon F4 specifically for night skies photography. I have only used it a couple of times in Orkney and Glencoe but have been very impressed so far.
USEFUL TOOLS
Photo Pills for the iPhone – the best night skies planning app for I phone with real-time position and elevation of the Milkyway. The learning curve is fairly steep though.
Google Earth is a great time saver in terms of planning as well.
And finally, have a look at my upcoming landscape photography workshops if you are interested in having the opportunity to learn to photograph the night skies first hand. I hope you enjoy this night sky photography tutorial for now!